
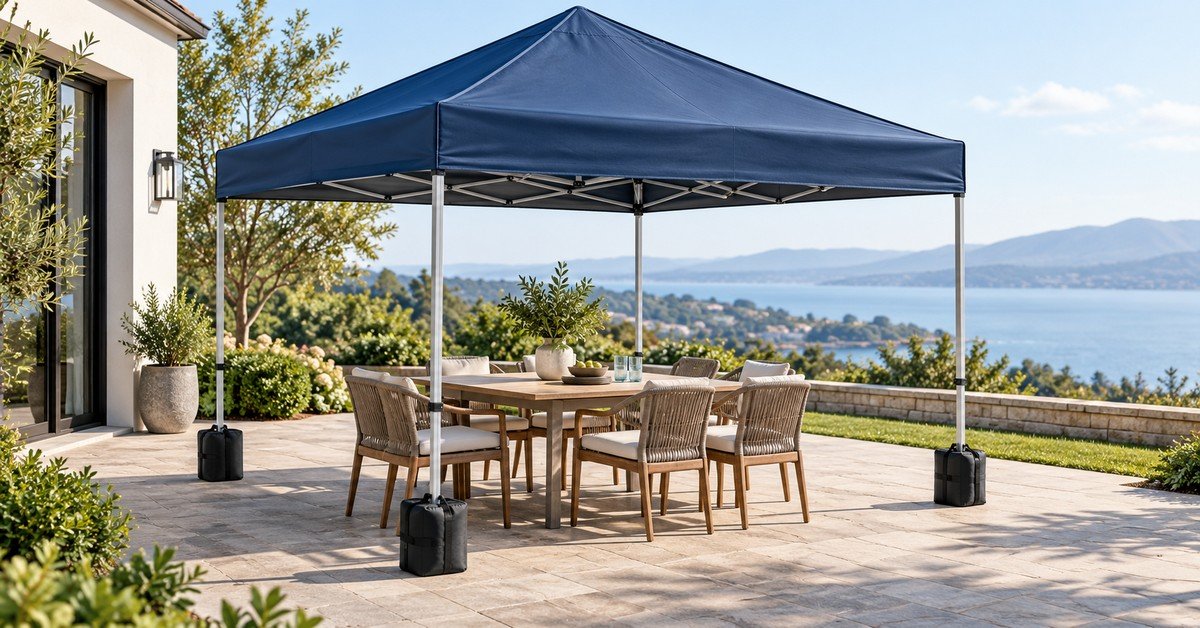
What is a canopy tent, and when does this portable roof earn its space in your yard? A canopy tent is a temporary overhead shelter supported by a frame or poles, usually with open sides. It creates a covered place for activities such as eating, displaying goods, or resting outside. Most portable versions have no built-in floor, so the ground remains part of your setup.
A covered table can feel comfortable while the route around it remains cramped or exposed. The useful shelter is the whole arrangement, including furniture, access, anchoring, and a place to retreat when conditions change.
Some canopies unfold from a connected frame, while others require separate poles and a more involved installation. Optional walls can change privacy and exposure, but they also change how the shelter behaves. The name alone tells you little about a particular model’s rain resistance, stability, or setup requirements.
Start by deciding what you want the covered space to do. Then check the space available, the manufacturer’s instructions, and the forecast for the hours you plan to use it. As an Amazon Associate, Shelter Set earns from qualifying purchases.
Jump to a specific section on this article
What is a canopy tent, and how is it built?
Think of a canopy tent as an overhead cover with its support system attached. The fabric forms the roof, and the frame or poles hold that roof above the activity. Anchors connect the assembled shelter to the ground or another manufacturer-approved restraint system.
On a folding canopy, linked scissor sections spread as the legs move apart. The CROWN SHADES 10×10 CenterLok uses a central push-lock hub to lock the opened frame. Adjustable legs change the working height, while feet provide contact points at ground level. Those small components matter because a roof cannot function properly when its support system remains partly unlocked.
The valance is the fabric skirt hanging down around the roof edge. A vent, when fitted, is an opening designed into the roof assembly. Neither a skirt nor a roof vent establishes a universal weather rating for the shelter.
Understand the structure
A roof, a frame, and an anchoring system
Identify each part before comparing sizes or accessories.
The overhead cover, including its edge skirt or valance.
Members and connections that hold the assembled roof above the activity.
Ground-level supports; their positions may differ from the roof edges.
Space for the model-specific restraint arrangement beyond or beside the feet.
Open sides make it easy to approach a table from several directions. They also allow sideways rain, low sunshine, insects, and surrounding activity into the covered space. A canopy therefore changes exposure without creating the same environment as a fully enclosed room.
The Eurmax USA 10×10 four-wall canopy includes removable zippered panels for changing the enclosure. Compatibility still depends on attachment positions, dimensions, and the manufacturer’s approved combinations. A wall sold for another frame may hang poorly or interfere with the intended fastening system. Check the exact model details before assuming that two similarly sized products will fit together.
The absence of a built-in floor is another important distinction. Grass, paving, mud, and drainage conditions still affect comfort underneath the roof. A loose groundsheet can add another item to secure and another edge for people to catch.
The diagram separates the roof, supporting frame, and anchoring zone so you can recognize each part. It is a simplified explanation rather than an installation drawing for a particular model. Use the actual manual for assembly order, attachment points, and anchoring instructions.
Common canopy types and how they differ
A pop-up canopy uses a connected frame that opens into shape. It suits people who repeatedly transport a shelter between storage and an outdoor activity. The folded frame remains one substantial item, even when the fabric travels separately. Check its packed length against your vehicle and storage space before concentrating on the roof size.
A sectional frame canopy uses separate members that connect during assembly. That arrangement can require more sorting, lifting, and space for laying out components. Its suitability depends on the specific structure, installation instructions, and help available.
Pole-supported event tents can use tensioned fabric, perimeter lines, and additional supports. Some designs place poles inside the covered area, affecting furniture positions and movement. Others offer a clearer central space through a different support arrangement. Large installations may need professional setup and site-specific checks beyond the scope of a small backyard canopy.
| Common arrangement | Useful distinction | Check before choosing |
|---|---|---|
| Folding pop-up canopy | Connected frame packs as a substantial unit | Folded length, lifting, locks, helpers, anchoring |
| Sectional frame shelter | Separate members assembled on site | Parts, assembly space, instructions, labor |
| Pole-supported event tent | Tensioned fabric may use interior poles and perimeter lines | Usable layout, professional installation, permitted site |
| Screen house | Screened sides with closable access | Mesh fit, ground edges, included roof and doors |
A screen house such as the Coleman Skylodge 15×13 surrounds the activity with mesh walls. Its two entryways let people and equipment enter without removing the screened enclosure. Screening does not automatically provide the rain resistance, privacy, or anchoring capacity you may expect from solid walls.
The difference between a canopy and a camping tent matters when you need sleeping space or enclosed weather protection. A sleeping tent commonly includes a floor, a closable body, and features intended for overnight use. An open canopy usually serves as a separate daytime living or working area.
Product names such as gazebo, shelter, and canopy overlap in everyday shopping language. Read the construction details rather than treating one marketing label as a technical classification. A permanent garden structure also brings different foundations, approvals, maintenance, and ownership questions.
The comparison in this section describes common arrangements rather than promising features for every product. Check the exact model whenever a particular characteristic determines your decision. A clear match between the shelter and its job matters more than choosing the most impressive category name.
Canopy tent uses for parents, picnics, and market days
At home, a canopy can turn an exposed table into a more comfortable place for a short gathering. It may also cover a temporary craft station or a dry-weather sorting area. The activity should fit beneath the cover without spilling into an essential route. A shelter that blocks the back door creates an access problem even when the furniture fits.
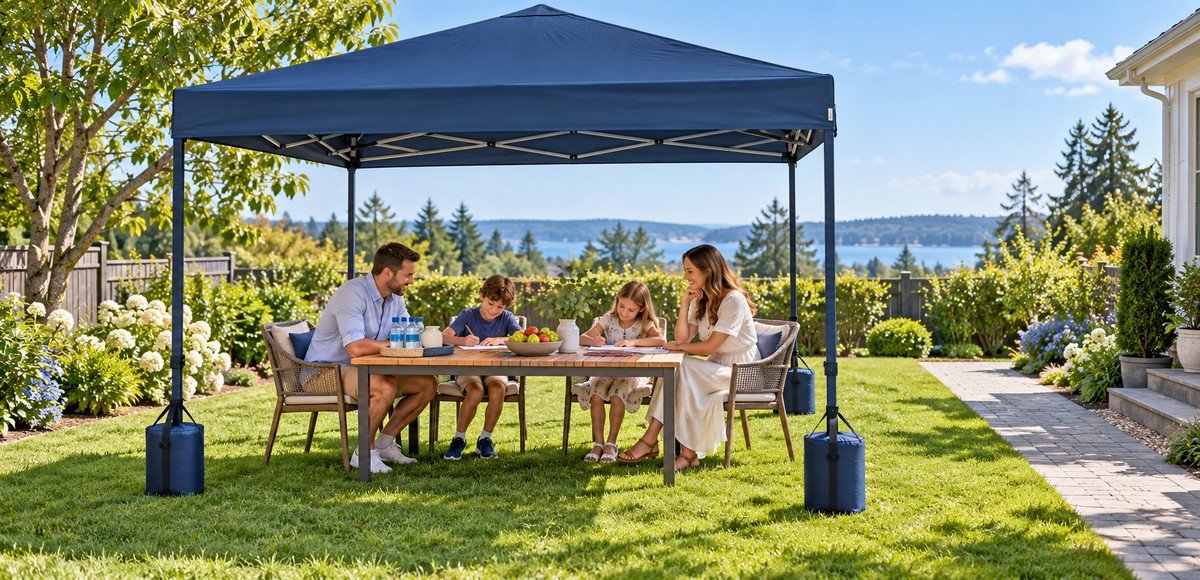
For parents, the covered area can provide a supervised place for children to eat or draw. Keep the activity away from weights, guy lines, folding joints, and the edge of the setup. Shade does not replace supervision, sun protection, drinking water, or a suitable indoor retreat.
Position a family table so chairs can move without pressing against the legs. Allow adults to reach children without squeezing through bags or equipment. Put the main walking route outside the anchoring zone whenever the site allows it.
At a market, the Eurmax USA 10×10’s removable walls let you leave the service side open. Stock, packaging, payment equipment, and the seller still need space behind the chosen counter. Check the organizer’s footprint, anchoring, access, and documentation requirements before booking a pitch.
A campsite canopy can create a separate place for daytime sitting or sorting equipment. It should not be treated as an overnight sleeping shelter without the appropriate purpose-designed enclosure and instructions. Keep cooking arrangements outside the shelter and follow appliance clearances and campsite rules. Solid walls can introduce ventilation problems as well as changing wind exposure.
For a sports sideline or outdoor meeting, consider the view and circulation around the shelter. A roof or wall can obstruct spectators, neighboring users, or an emergency access route. Venue permission and weather plans remain necessary even for a short visit.
Choose the smallest arrangement that comfortably supports the activity and leaves room for access. Larger roofs may bring more lifting, storage, setup space, and anchoring requirements. The family illustration shows one possible arrangement, without claiming that its visible weights suit every canopy or site.
Canopy roof area, usable space, and moving shade
A rectangular roof measuring ten feet by ten feet has a nominal area of one hundred square feet. That calculation describes a rectangle, rather than a guaranteed usable seating area. Legs, tables, open chair positions, and routes divide the space differently. Roof area also cannot tell you how many people a particular event may legally or comfortably accommodate.
Nominal canopy dimensions can describe the roof, the leg positions, or both, depending on the product. The EAGLE PEAK 10×10 slant-leg canopy has a ten-by-ten-foot base beneath an eight-by-eight-foot roof. That roof covers sixty-four square feet geometrically, although the legs occupy a larger ground footprint.
Measure the object you want to cover before choosing the surrounding roof. A table needs room for people to pull out chairs and stand beside them. A display needs space for a seller, stored stock, and customers approaching it. An empty square on paper cannot show those practical movements unless you draw them in.
Explore the geometry
How roof rectangles compare
Select, focus, or hover over a bar to read its calculation. These are geometric examples, not product specifications.
Nominal length × width (feet)
Rectangular roof area (square feet)
Length × width = nominal rectangular area. Seating and anchoring space are not calculated.
The interactive chart compares rectangular areas using length multiplied by width. Its examples use feet, and its results describe geometry rather than actual products. Select a size to see the exact calculation and its scale relative to the other examples.
Do not treat the largest bar as a recommendation for your site. The corresponding structure may require different equipment, assembly methods, installation space, or professional help. The chart deliberately makes no seating-capacity claim for any of these examples.
Sunlight approaches at an angle, so the shadow shifts with the sun’s position. Useful shade coverage changes as the sun moves, even though the roof stays in place. Observe your intended sitting area during the actual hours you expect to use it.
A roof that covers a table at midday may leave its edge exposed later. Moving furniture can sometimes preserve comfort without relocating the entire shelter. Do not reposition or partially dismantle an occupied canopy while people remain in the working area.
Planning the canopy footprint, access, and anchoring
Start with a level, suitable site where the entire setup can sit within the space you control. Check overhead obstructions, door movements, surface changes, drainage, and the route back indoors. Permission to use the space does not automatically include permission to drive stakes into it.
Underground services and site restrictions can make an otherwise convenient patch unsuitable for staking. Ask the property owner or venue about approved anchoring arrangements before selecting equipment. The required restraint system depends on the shelter, surface, accessories, installation, and anticipated conditions. There is no single weight-per-leg figure that makes every canopy safe.
Anchoring instructions also depend on approved attachment points and how the equipment is connected. A heavy object sitting nearby does not restrain a leg unless the intended connection actually transfers the force. Keep straps, weights, and lines out of the normal walking route where possible. Never remove required anchoring simply because a narrow site makes it inconvenient.
Space planning only
Canopy footprint fit planner
Compare the actual ground footprint plus your chosen margin with the rectangle available on site.
Changing units converts the entries already shown.
Use the largest real ground footprint, including slanted legs. The margin is your planning assumption; the manual and venue determine actual restraint and clearance needs.
Legend: pale field = available site; dashed outline = footprint plus margin; blue = actual footprint. Drawing shows the selected orientation.
Formula: required width = footprint width + 2 × margin; required length = footprint length + 2 × margin. Example: 10 × 10 ft with 2 ft on every side needs 14 × 14 ft, or 196 ft².
The footprint planner adds a chosen clear margin around the entered ground footprint. That margin is a planning allowance you supply, not an anchoring specification or a required legal clearance. Enter the largest actual ground footprint, rather than assuming the advertised roof size matches it.
The planner tests both orientations against the available rectangle and displays the result. Its diagram scales the rectangles while keeping their proportions, so an awkward narrow fit remains visible. The result cannot account for slopes, doors, services, obstructions, or the strength of any anchor.
For example, a ten-by-ten-foot footprint with a two-foot margin needs a fourteen-by-fourteen-foot planning rectangle. That rectangle occupies one hundred ninety-six square feet before any separate access route is added. A thirteen-by-sixteen-foot site has more total area but still fails that rectangular fit.
Use the result to identify measurements that need checking on the actual site. Then compare the manufacturer’s anchoring arrangement and your circulation plan against those measurements. The following two checks separate furniture space from the space needed around the shelter.
Checking furniture and movement inside the canopy
Lay out the furniture at its working size before marking the canopy position. Pull chairs out to the positions people actually use when getting up. Open storage boxes, display doors, or equipment lids that need access. Include the person carrying a tray or moving a chair in your sketch.
Do not assign the same strip of ground to two activities that happen together. A serving position beside a table cannot also remain a reliably clear through-route. Move the furniture or revise the canopy size when these needs overlap.
Check usable height where people enter and where equipment stands upright. Peak height describes the highest point, which may be far from the entry edge. A low valance or cross member can reduce clearance where you need it most.
Try the arrangement without guests before treating it as ready. A short walkthrough can reveal awkward turns and furniture that blocks a leg. Keep the final drawing with the measurements so the setup can be repeated.
Checking the anchoring zone and route around the canopy
Mark each required anchoring position outside or beside the actual feet. Include lines, ballast, straps, and any access needed to connect them. A roof-sized outline alone leaves these parts of the installation invisible.
Trace the route between the gathering area and a suitable building or vehicle. Keep the route separate from storage piles and loose equipment. Consider who will need help moving through it if the gathering ends quickly.
Check boundaries with the owner when the setup approaches a shared path. Public access, venue rules, and accessibility requirements may set constraints beyond your chosen planning margin. A tool result cannot confirm compliance with those requirements. Ask the responsible venue or local authority before finalizing an event layout.
Recheck the finished layout after installing approved walls or changing the furniture. Those changes can affect both circulation and the manufacturer’s restraint requirements. Leave the site unsuitable if the necessary installation cannot fit within the permitted space.
Canopy tent benefits and weather limitations
A canopy’s main benefit is a defined overhead cover where a permanent roof is unnecessary or impractical. Open sides can preserve views and make it easy to move between covered and uncovered activities. Portability also lets the space return to another use after the shelter is packed away.
Direct shade can improve comfort, but it does not eliminate ultraviolet exposure. Light can reach beneath the roof from the sides and from surrounding surfaces. Use other appropriate sun-protection measures as well as choosing a suitable fabric. Check a stated ultraviolet protection rating for the actual roof fabric rather than inferring protection from its color.
Rain performance varies with fabric, coatings, seams, tension, and the shelter’s intended use. A water-resistant roof may not keep sideways rain or prolonged rainfall away from everything underneath. Follow model-specific weather limits instead of assuming that every peaked roof is suitable for wet conditions.
Know the limit
Useful cover is not an all-weather refuge
A simple decision guide for temporary recreational shelters.
Check the shaded position during use and the actual fabric rating. Keep other sun protection in the plan.
Roof construction, walls, anchors, and conditions matter. Stop when the model’s limits or supervision are exceeded.
Use the identified substantial building or suitable enclosed hardtop vehicle. Do not wait underneath a canopy.
Wind can move or damage a temporary canopy, including one that initially feels steady. Adding walls changes the surfaces exposed to wind and may change the permitted setup. A roof vent or an impressive frame description does not create a universal safe wind speed.
A canopy is not a safe place to wait through a thunderstorm. The National Weather Service advises people hearing thunder to move into a substantial building or enclosed hardtop vehicle. Plan that destination before setting up, so leaving does not require an improvised decision. Do not delay getting people to shelter in order to rescue a canopy or furniture.
Snow loading, standing water, and unattended exposure can exceed what a temporary shelter was designed to handle. The correct response comes from the manual, the conditions, and a plan made before the event. Stop using the shelter when its stated limits or your ability to supervise it are exceeded.
The weather cards in this section separate useful cover from situations requiring a different response. They do not rate a particular product or replace its instructions. Use them to decide which questions must be answered before people gather underneath.
Choosing canopy frame materials, fabric, and sidewalls
Frame materials influence carrying weight, maintenance needs, and the way individual parts are built. Steel and aluminum are common options, but the material name is only a starting point. Joint construction, member dimensions, locking mechanisms, and replacement support also affect the practical ownership experience.
A lighter frame may be easier to carry between a vehicle and the setup area. A heavier frame can create a lifting problem before the first outing. Neither property establishes a safe wind rating on its own. Compare the complete product instructions and specifications rather than treating weight as proof of stability.
Fabric descriptions may mention polyester, polyethylene, vinyl coatings, or a combination of layers. The finished roof’s performance depends on more than its main fiber or coating name. Seams, fastening points, reinforcement, and care requirements deserve the same attention as the material label.
Read the whole specification
Three linked decisions, not one material score
Trace the question from the roof, through the supporting structure, to compatible accessories.
Fabric, coating, seams, reinforcement, UV rating, rain limits, and cleaning instructions.
Assembled and packed dimensions, carrying weight, locking parts, helper requirements, and replacements.
Correct wall attachments, anchoring arrangement, storage bag, and instructions for the chosen configuration.
The CROWN SHADES listing specifies 150D roof fabric, illustrating how denier appears in product descriptions. Denier describes the yarn’s linear mass, rather than a complete rating of the roof’s performance. It does not independently measure waterproofing, seam strength, ultraviolet protection, or the strength of the assembled shelter. Compare documented characteristics that matter to your activity instead of ranking roofs by one figure.
Solid sidewalls can add privacy or reduce exposure from one direction. They can also change airflow, visibility, access, and the installation requirements. Choose only the wall arrangement approved for the exact shelter and intended conditions.
Mesh walls serve a different purpose from solid panels. They help create a screened space when doors and edges are arranged correctly. They should not be described as equivalent rain barriers or as an automatic safety enclosure for children.
The component guide in this section identifies questions to ask about the roof, frame, and accessories. It deliberately avoids assigning a universal winner to one material. The better choice is the documented assembly that matches your use and can be maintained with available parts.
Setting up and taking down a canopy tent
Read the manual before arriving at the site with guests or a loaded vehicle. Check the specified number of helpers and the required anchoring equipment. Practice unfamiliar locks and assembly steps under suitable conditions before relying on the shelter for an event.
Lay out the parts on a surface where fabric will not scrape across sharp edges. Inspect joints, fasteners, fabric attachments, and the feet before raising the frame. Do not force a bent member or use a damaged lock to complete the setup. Arrange repair or replacement when a required component cannot function as intended.
Keep hands away from moving scissor joints and other pinch points. Raise or extend the shelter in the order given by its manufacturer. Confirm every required lock has engaged before anyone uses the covered area. Install the approved restraint system and accessories as directed, including any instructions that change with walls fitted.
Preparation record
Before people gather underneath
Check each topic after reviewing the actual setup. This is not a structural or safety certificate.
0 of 6 topics reviewed
Walk around the finished setup with the manual’s checks in mind. Look for loose connections, fabric snagging, uneven contact, and lines crossing a route. Correct the arrangement before adding furniture and inviting people beneath the roof.
Give someone responsibility for watching conditions during use rather than assuming another person will notice a change. Agree in advance where people will go if the activity ends. A forecast checked during breakfast is not a substitute for paying attention later.
During routine takedown, clear people and loose belongings from the working area. Follow the specified sequence so the frame and fabric remain controlled as parts are released. Emergency weather is a reason to prioritize people, rather than attempt a rushed equipment recovery.
Use the checklist in this section to remember preparation topics, while following the manual for the actual installation sequence. Its checked boxes record your review of the questions, rather than certifying a safe structure. Reset it whenever the site, shelter, or intended wall arrangement changes.
Cleaning, drying, and storing a portable canopy
Dirt left against folded fabric can make the next setup unpleasant and conceal developing damage. Brush away loose debris and follow the manufacturer’s cleaning instructions for the roof and frame. Avoid assuming that household solvents, bleach, or a washing machine are suitable for the fabric and coating.
After cleaning or damp use, allow the fabric and frame to dry fully before storage. Open out folds and inspect seams where moisture can remain trapped. E-Z UP’s care guidance specifically calls for complete drying to help prevent mildew. The drying illustration shows that preparation stage, with equipment separated and accessible.
Keep sharp stakes, tools, and loose fittings from rubbing directly against the roof during transport. CROWN SHADES’ STO-N-Go system allows its compatible 10×10 frame to pack with the roof fabric attached. Dry that fabric fully first, and check the carrying bag’s condition and handles before lifting. A damaged bag can make an otherwise manageable load difficult to control.
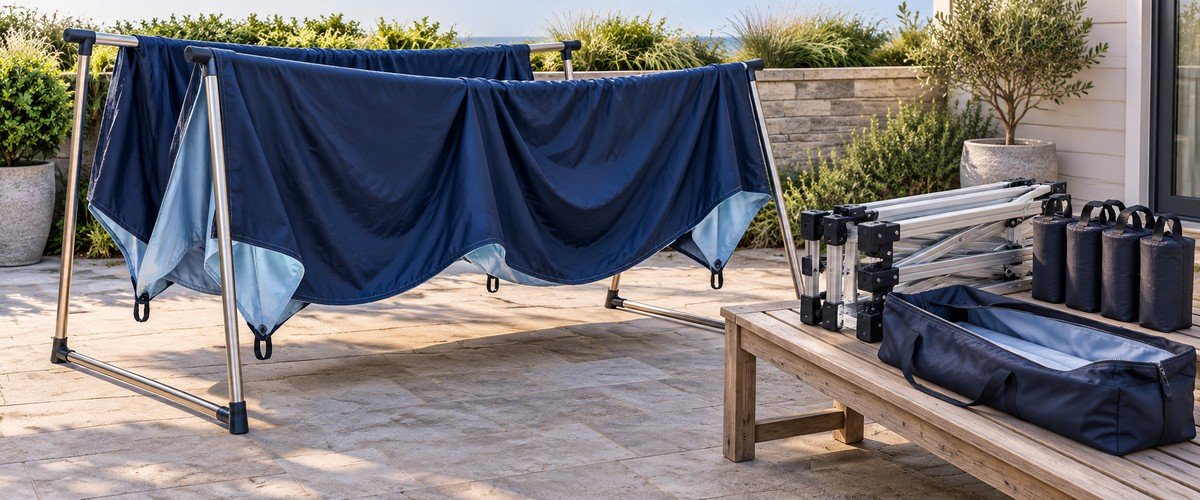
A shelter’s packed size and transport weight matter every time you carry it between storage and the setup area. Measure the storage opening as well as the space available inside. A long frame that fits a cupboard may still be awkward to turn through its doorway.
Store the equipment in a clean, dry place suited to its materials and instructions. Avoid placing heavy items on the roof fabric or unsupported frame members. Keep the model details and manual where you can identify replacement parts later.
Inspect fabric attachments and joints again before the next outing. Wear can develop at repeated folding points, rubbing surfaces, and frequently operated locks. A timely replacement is more useful than discovering a missing or broken component beside an assembled event.
Do not promise yourself a fixed number of years from a canopy’s appearance alone. Exposure, handling, storage, repair support, and the specific construction all affect service life. Treat care as a repeatable routine rather than expecting the roof to remain outdoors between occasional uses.
When to buy, rent, or choose another shelter
Buying can make sense when the same temporary setup will be used repeatedly. The purchase also brings responsibility for transport, storage, inspection, and replacement parts. Include approved anchors, accessories, and a suitable bag in the practical ownership plan. A low roof price can hide a less convenient or incomplete setup.
Renting may suit a single event, a larger structure, or a site needing professional installation. Confirm who measures the site, obtains required permissions, installs the shelter, and monitors conditions. A rental agreement should make responsibilities clear rather than leave them to assumptions on the day.
A permanent covered structure may suit a space that needs dependable everyday use. That decision involves foundations, local requirements, property permission, and appropriate professional advice. An ordinary temporary canopy should not be left in place as an unexamined substitute. If you rent your home, confirm what changes and attachments the owner actually permits.
Compare the ownership trade-offs
Buy, rent, or plan something permanent?
Select the situation closest to your task to see the next useful checks.
Check the complete package, packed length, lifting arrangements, drying space, and replacement parts.
This selector compares planning routes; it does not recommend a product or determine approval requirements.
The complete canopy planning process brings these checks together before you compare individual models and accessories. Make the intended activity, measured site, and storage arrangement your shortlist criteria. Then compare the complete equipment package needed to use each option as instructed.
Use the selector in this section to explore the trade-offs between repeated portable use, occasional rental, and a permanent project. Its results are planning prompts rather than product recommendations or an assessment of local approval requirements. The best next step depends on the constraint you identify.
Before paying, ask for the exact model manual, ground footprint, packed dimensions, and compatibility information. Check that replacement roofs, locks, or other service parts can be identified for that model. For an event, confirm the venue’s requirements before ordering the structure.
A canopy is a useful choice when temporary overhead cover matches the task and the site can support the complete installation. Choose another arrangement when your requirement is secure enclosure, permanent exposure, or shelter from dangerous weather. That boundary is more useful than treating a bigger roof as the answer to every outdoor problem.
Frequently Asked Questions About Canopy Tents
Does a canopy tent have walls or a floor?
An open-sided model such as the CROWN SHADES 10×10 CenterLok provides a roof and frame without a built-in floor. The Eurmax USA 10×10 four-wall canopy adds removable panels around that same floorless arrangement. Check whether the selected Amazon package includes walls, because similarly named versions can differ. Solid walls or mesh panels do not turn either canopy into a purpose-designed camping tent.
The ground beneath the canopy still needs checking for drainage, surface condition, and access. Adding a mat does not turn the shelter into a purpose-designed sleeping tent. Read the enclosure instructions if overnight use is part of your plan.
Is a ten-by-ten-foot canopy large enough for a family table?
It may be, but the table dimensions alone cannot establish a comfortable fit. Measure the table with chairs pulled out and space for people to move. Then compare that working arrangement with the actual leg positions and entry clearances. A slanted frame or low roof edge can change usable space around the perimeter.
Keep anchors and the route around the canopy in the separate site plan. Do not use a generic people-per-square-foot estimate as proof of a suitable layout. The quick measurement record below helps separate these checks before you choose a size.
| Measurement | What to include | Record it separately |
|---|---|---|
| Working furniture layout | Chairs pulled out, lids open, people moving | Width × length |
| Actual ground footprint | Leg positions and other ground-level projections | Width × length |
| Installation zone | Approved anchors, lines, walls, and required access | Manual and venue requirements |
| Height and access | Entry edge, obstructions, route to shelter | Lowest relevant clearance |
Can I leave a portable canopy up overnight?
Do not assume a temporary canopy is suitable for unattended overnight exposure. Follow the exact manufacturer’s instructions and the venue’s requirements for the assembled configuration. Changes in weather can develop while nobody is present to supervise the shelter. For routine temporary use, plan enough time to pack it away after the activity ends.
Is a canopy tent waterproof?
The CROWN SHADES 10×10 listing describes its 150D roof as water-resistant, which does not establish unrestricted rain protection. Check the specific roof, seam construction, stated resistance, and weather limitations. Open sides also allow sideways rain to reach furniture and equipment. Water collecting on a roof is a reason to stop and follow the manufacturer’s instructions. Do not push up a loaded roof while standing beneath it or assume extra tension solves the underlying problem.
How much weight does each canopy leg need?
There is no universal ballast figure that suits every canopy and installation. The US Weight 40 lb Tailgater set, for example, contains four prefilled 10 lb weights. That means 40 lb for the whole set, rather than 40 lb on each leg. Use the canopy manual and venue requirements to decide whether that amount and attachment system suit your installation.
Eurmax’s 140 lb four-pack sandbags are listed with capacities up to 35 lb each and arrive without sand. Filling capacity differs from the ballast required for a particular canopy, site, and wall arrangement. Fill, weigh, and attach bags according to the canopy manufacturer’s approved anchoring arrangement.
A heavy object beside a leg provides no restraint without the specified connection to the shelter. The footprint planner calculates space, so its chosen margin cannot determine ballast or wind resistance. If the approved anchors and access routes cannot fit, choose another site or shelter arrangement.
Does a canopy protect people from lightning?
A canopy does not provide a safe refuge from lightning. Open shelters and camping tents are not substitutes for a substantial building or suitable enclosed hardtop vehicle. Decide where people will go before beginning the outdoor activity. Check that the route and destination are available to everyone attending.
When thunder is heard, move people to the identified safe shelter promptly. Do not wait underneath the canopy for visible rain to reach the site. Retrieving furniture or dismantling equipment must not delay that movement.
Include the weather decision in your gathering plan rather than leaving it to an informal assumption. Give one person responsibility for monitoring conditions and communicating an early finish. The shelter’s purchase price or anchoring system does not change the lightning decision.
Can I cook beneath a canopy or inside its walls?
Do not assume an ordinary fabric canopy is an approved cooking shelter. Keep grills, flames, and hot appliances outside it, following the appliance and shelter manufacturers’ clearances. Enclosing a space around fuel-burning equipment can also introduce carbon monoxide danger. A roof described as flame-resistant is not fireproof or permission to ignore separation requirements.
Food stalls may need equipment and arrangements approved by the event organizer and local authority. Check those requirements before planning service around an ordinary recreational canopy. Do not use a closed wall arrangement as a shortcut to an indoor cooking space.
Keep the covered table for eating, preparation without heat, or other uses permitted by the equipment instructions. Position any approved outdoor cooking area so people can pass without encountering hot surfaces. If the required clearances cannot be maintained, choose another location or cooking arrangement.
Can one person assemble a pop-up canopy?
EAGLE PEAK markets its 10×10 slant-leg canopy’s central push system for one-person setup. The CROWN SHADES 10×10 CenterLok listing describes setup with two people, despite its one-push mechanism. Packed weight, reach, locks, and the space available can all affect the task. Follow the exact model manual and install its approved anchoring before using the shelter. Arrange help when you cannot control the equipment through the instructed sequence.
Practice before a busy outing so unfamiliar steps do not become a rushed experiment. Keep children and bystanders clear of moving joints and the assembly area. If conditions prevent controlled setup, postpone the activity rather than forcing the frame into position.
What should I check before buying my first canopy tent?
Start with the activity, actual ground footprint, available site, and the manufacturer’s use limitations. Check the roof dimensions separately from the feet and any required anchoring zone. Measure the packed frame against your vehicle, storage opening, and lifting arrangements. Confirm what comes in the package and which necessary components cost extra.
Ask for the model manual before comparing optional walls or replacement roofs. Check local or venue requirements where the shelter will actually be used. For a large event or uncertain installation, discuss the site with an appropriate professional supplier.
The downloadable worksheet records those questions without prescribing an unverified clearance or ballast figure. Take the completed measurements to a seller or installer so the discussion uses the actual site. Keep the final manual and equipment list alongside the completed worksheet.
Buy only when the complete setup fits the job, site, storage, and supervision you can provide.
Take the measurements with you
Canopy site and equipment worksheet
A two-page printable record for discussing the actual site, equipment, access, and weather plan.
Download the canopy planning worksheet (PDF, 2 pages, 4 KB)
Print at actual size or write your measurements on a separate sheet. The worksheet does not prescribe ballast or certify an installation.
Ready to Explore Canopy Tents?
The answer to what is a canopy tent is a temporary overhead shelter whose usefulness depends on the complete setup. It works well for suitable short-term outdoor activities when the frame, roof, site, and approved anchoring arrangement fit the task. Measure the working furniture layout and the full installation space before choosing the advertised size. For permanent exposure, sleeping accommodation, or dangerous weather, choose the shelter specifically designed and approved for that requirement.