
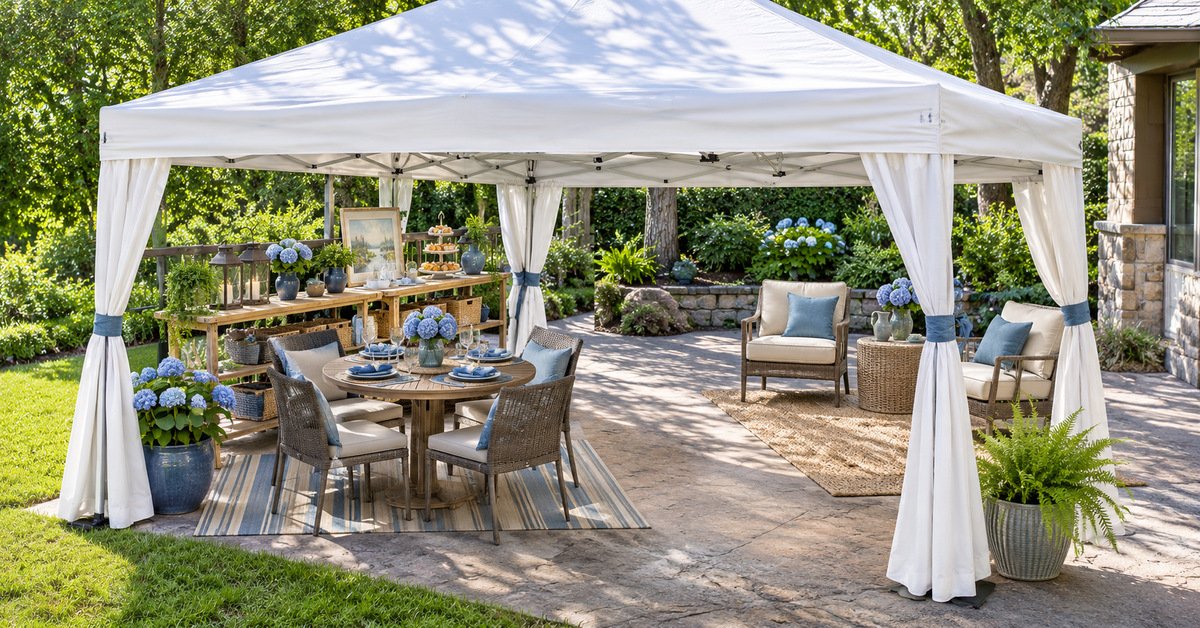
A 12×12 canopy tent covers 144 square feet of nominal roof area, but the best furniture layout depends on its purpose. For four-person dining, start with one compact round table instead of filling the shelter with multiple dining sets. For selling, arrange shallow displays along two edges, while a lounge works well with two facing chairs. These are measured starting points, because frame legs and occupied furniture can reduce the space available for movement.
The best dining layout gives chairs room to move, while the strongest vendor setup preserves a direct browsing path. A combined dining-and-lounge arrangement works only when each activity leaves a clear route to the outside.
Measure every table, chair, shelf, and counter before assigning it a position beneath the roof. Sketch the entrance, support legs, guy lines, and any areas exposed to wind-driven rain. Keep an obvious route to the outside so guests never need to squeeze between furniture.
The most useful layout is one that supports the activity without turning the canopy into a crowded storage area. Use simple measured zones for eating, browsing, serving, or relaxing rather than filling every corner. Then test the arrangement with real chairs pulled out and people moving through it.
Jump to a specific section on this article
Plan Furniture Zones Within a 12×12 Canopy Tent
Choose the front edge as the entrance side, then sketch a twelve-foot square with all four leg positions. Mark a continuous route from that edge to the places guests actually need to reach. Place the largest piece first, whether that means a dining table, a display counter, or two lounge chairs. Measure clearances again after adding occupied chairs, sidewalls, and supports because roof dimensions do not equal usable floor dimensions.
For dining, place a single table near the center and keep spare chairs away from the entrance. For sales, arrange shallow display surfaces along the rear and left edges while leaving the front visibly open. For lounging, group two facing chairs around a small table and reserve a clear travel strip along one side.
Measure the actual clear distance between legs before trusting a diagram based on advertised dimensions. Comparing canopy size and coverage measurements helps show why roof area differs from practical floor space. Write each furniture footprint on the sketch, then add the space required while someone uses it.
| Layout example | Furniture dimensions | Nominal remaining span | How to use the estimate |
|---|---|---|---|
| One centered round dining table | 48 in diameter | 48 in to each nominal roof edge | Starting point for four occupied chairs; actual clearance must be measured |
| One centered larger round table | 60 in diameter | 42 in to each nominal roof edge | More tabletop area but less room for chairs and circulation |
| One centered rectangular banquet table | 72 × 30 in | 36 in at each short end; 57 in along each long edge | Test four chair positions along the two long sides |
| Opposing perimeter displays | 24 in deep each | 96 in between display fronts | Illustrates a central aisle before browsers or frame hardware |
| One rear display | 24 in deep | 120 in of nominal depth ahead | Useful for a front-facing counter and open customer approach |
Place bulky pieces against a side where guests will not repeatedly walk behind them. Keep central circulation free when several people need access to different zones. If a buffet occupies one edge, shift dining chairs away from its serving line. Consider a separate nearby surface for boxes, spare chairs, and other supplies that do not need shelter.
Tape the planned footprints onto the ground before carrying tables into the canopy. Invite someone to walk through the arrangement while another person pulls out a chair. Change the layout whenever either person must turn sideways or move an object to pass.
Arrange Round Dining Tables Under a 12×12 Canopy
Begin with a 42- to 48-inch round table for four diners and measure its footprint with chairs occupied. Put chairs on four sides rather than adding a second table within the same twelve-foot square. A 60-inch top provides more serving surface but reduces space behind every chair. Compare the tabletop diameter plus actual chair pull-out against measured leg-to-leg clearance before assigning seats.
For a four-place setting, position chairs at the north, south, east, and west sides of the table. Six people around a five-foot top may fit for short meals, but their pulled-back chairs make movement difficult. Choose the smaller layout when service equipment, stroller space, or a dedicated accessible route must share the shelter.
When a larger surface is needed, the Flash Furniture Scarborough 5-Foot Round Bi-Fold Plastic Folding Table, Granite White measures approximately 60.5 inches across. That size makes a useful planning example because its edge consumes a substantial portion of the shelter width. It is better suited to one focused dining group than a mixed buffet-and-lounge arrangement. Check the exact table configuration and leg placement before assuming everyone has knee room.
Position the table slightly away from the busiest entrance so chairs do not open into arriving guests. Assign one chair position as the most convenient path toward the outside. Keep drinks and serving trays on a small side surface only if the route remains open.
Before guests arrive, pull every chair backward to a realistic standing position. If the backs collide with legs or neighboring seats, choose fewer chairs or a smaller table.
Fit Banquet Tables Into a 12×12 Canopy Dining Layout
Try one 72-by-30-inch banquet table lengthwise, with two dining chairs along each long side. Leave its short ends unseated so those ends remain available for access and shared dishes. This four-place layout is easier to navigate than a six-seat version with chairs at both ends.
Align the table’s long axis from the canopy entrance toward the rear to organize chair positions. Place two chairs on each long edge, then pull them out to check the remaining side clearances. Put buffet service outside the dining footprint rather than squeezing another long table beside the diners. Two banquet tables need a separate dimensioned plan because combined chair positions can quickly consume both aisles.
For a long dining surface, the COSCO 6-Foot Fold-in-Half Banquet Table with Handle, White measures approximately 72 by 30 inches. Its footprint is useful for checking whether a buffet and chair row can share one edge. The product’s folded carrying configuration does not reduce the space it occupies when opened.
Leave clear approach space before and after a table rather than placing its end against the entrance. In a rain-exposed setup, keep seating and serving utensils away from the drip line. When frame geometry changes usable placement, consult the canopy buying and sizing guide to compare shelter styles. A layout drawn for straight legs may need revision around slanted legs or inward braces.
Test the most crowded moment, when people stand behind chairs while others carry plates. A measured walkway is more dependable than a seat count printed on a furniture package.
Use fewer table positions if movement becomes awkward once every chair is occupied.
Design a Buffet and Serving Area Under a 12×12 Canopy
For buffet-only service, place a four-foot serving table along the rear edge facing the entrance. Arrange plates at the left end, dishes in the middle, and utensils near the right-hand end. Leave the space in front available for guests moving through the line instead of adding chairs. Move beverages beyond the canopy when a separate drink queue would intersect the food line.
A four-foot serving table is often more adaptable than a longer banquet surface inside a small shelter. For an adjustable serving surface, the Lifetime 4-Foot Commercial Adjustable Height Folding Table, Almond, Model 80387 offers a 48-by-24-inch top. Manufacturer documentation lists three height settings, making counter height a deliberate equipment choice rather than an assumption.
Place plates at the beginning of the line and waste collection beyond its endpoint. Keep food preparation and handwashing arrangements separate from the guest circulation path when required. A helper can replenish dishes from outside the canopy without walking against the serving flow.
For a buffet plus dining, put a compact two-person cafe table near the front corner away from the serving queue. A small round top and two chairs use less circulation space than a second banquet table. Manage food temperatures appropriately and avoid placing exposed food where afternoon sun reaches the serving area.
Mark the queue entrance clearly with the furniture orientation rather than another freestanding sign. Test whether someone carrying a full plate can turn without brushing chairs or table edges.
Move the buffet outside the tent when safe circulation cannot be maintained inside.
Create a Perimeter Display Layout for a 12×12 Canopy
An L-shaped display is a useful starting arrangement for a twelve-foot market canopy selling small merchandise. Put one shallow display along the back and another down the left, leaving the front and right side open. Show the featured items near the front-left corner without narrowing the main entrance.
Use display surfaces approximately 18 to 24 inches deep for merchandise that customers should reach comfortably. Two opposing 24-inch-deep runs would leave eight feet between display edges within a full twelve-foot width. An L-shaped arrangement avoids crowding both sides and leaves a broad open center for browsing. Recheck those dimensions at the actual leg positions because frame hardware and angled supports can intrude.
Put tall displays farther from the entrance so they do not hide the booth interior. Arrange merchandise by use or theme to create a logical browsing sequence. Keep fragile or heavy goods low enough to reduce tipping and awkward reaching.
For craft work, separate demonstrations from the display where shoppers handle finished items. A small demonstration surface can occupy a back corner while leaving the aisle unbroken. Use stable fixtures that do not depend on the canopy frame for unauthorized suspension. Check overhead and side clearances whenever banners, clamps, or hanging merchandise are installed.
Plan a discreet restocking position where boxes stay out of sight and out of the walking route. After setup, view the booth from across the aisle to see whether the layout clearly communicates its purpose. Remove one fixture if the display looks crowded before shoppers have even entered.
Set Up a Walk-Through 12×12 Canopy Market Booth
For a U-shaped booth, run shallow display surfaces along the rear and both sides while leaving the front open. For larger merchandise, use the rear and left edges only, creating a wider right-side browsing lane. The U arrangement favors many small products, while the simpler gallery favors items needing inspection space.
Avoid a central island unless there is room for people to pass on both sides. Place popular items where shoppers can approach without turning back through a queue. Keep cash handling within sight of the entrance but away from the narrowest passage. Before expanding the booth footprint, compare vendor expectations with the market booth sizing discussion and local event rules.
Vendor rules may limit canopy size, permitted sidewalls, signage, or the direction of customer entry. Confirm the actual pitch boundaries separately from the canopy roof dimensions. Anchor the shelter according to its manufacturer’s directions and the event organizer’s requirements.
Begin the shopper route at the front left, continue along the displays, and finish near checkout on the right. Keep the payment counter against the rear-right edge if the customer can approach without crossing another shopper. Provide a restocking position behind the selling surface so the vendor need not enter the browsing lane. Guide any waiting line outside the front opening rather than allowing it to block neighboring stalls.
An uncluttered front edge helps shoppers understand the invitation to enter. A deliberate exit path also prevents customers from getting trapped behind browsing groups. The booth should remain workable when someone stops unexpectedly to inspect an item.
Position 12×12 Canopy Displays Along Customer Paths
Place the most recognizable product group at the front-left display where pedestrians can notice it immediately. Organize related categories along the back run and smaller companion products along the right return. Leave the center open so customers can step back to compare items without blocking another display. Keep heavy items on stable lower shelves and reserve tall signage for positions that preserve sightlines.
Leave a clear visual connection between the entry and the point where shoppers can turn around.
Use open floor area as part of the presentation instead of filling every square foot.
Check sightlines at both standing and seated eye levels before the booth opens. If a display blocks the view of the checkout point, shorten or reposition it. Move temporary stock behind the selling surface before customers start browsing.
Place Checkout Counters Without Blocking the Entrance
Put a narrow checkout counter along the rear-right side rather than across the twelve-foot entrance. Face its customer edge toward the browsing space so the queue follows the intended route. Position the bagging surface beside the cashier instead of stacking completed purchases at the doorway. Leave a separate exit approach whenever the booth’s geometry and the event rules permit one.
Do not make every entering customer pass directly through the payment queue. If shoppers need demonstrations, separate that interaction from the counter’s transaction space. A modest movable table allows the checkout position to change as foot traffic shifts.
Face the counter toward an open area so customers can approach without twisting around furniture. Avoid extension cords across routes, and use protected wiring only where permitted. Keep cash equipment secure without attaching heavy accessories to an unapproved canopy frame. If people queue in two directions, reorient the counter before the problem becomes routine.
Test the route with someone completing a purchase while another person enters and browses. The cashier should have room to step away from the counter without colliding with stock. Keep a clear path from the checkout position to the outside throughout the event.
Arrange Comfortable Lounge Seating in a 12×12 Canopy
For a two-person lounge, face two compact armchairs across a small table approximately 18 to 24 inches wide. Group this conversation setting toward the left and leave a clear travel strip along the right. That arrangement favors comfortable conversation over squeezing the greatest possible number of seats under the roof.
Measure each armchair’s actual depth, including extended footrests or reclining backs where those features exist. For side-by-side seating, turn both chairs toward the open view with the small table between them. Add a third seat near the back only if its approach remains independent of the main walkway. Two movable armchairs generally offer more placement flexibility than a sofa that occupies most of one edge.
A small table within easy reach reduces repeated trips across the canopy for drinks. Lightweight side tables can move as people change seats or share the shelter. Keep walkways free of rugs that curl at the edges or catch chair legs.
Set the arrangement up before guests arrive and check how it feels with every seat occupied. Can people enter, leave, and change seats without asking others to stand up? If not, reduce the number of chairs rather than compressing the central pathway. Provide a stable surface for personal belongings so bags do not accumulate underfoot.
For longer gatherings, prioritize shade direction and airflow over squeezing in an extra chair. Leave room for a guest using a mobility aid to join the conversation comfortably.
Combine Dining and Lounging Zones Under a 12×12 Canopy
For mixed use, set a small two-person bistro table near the rear left with chairs on adjacent sides. Place two compact lounge chairs along the right edge and leave the center-front approach visibly open. This layout suits drinks and light snacks rather than a full seated dinner with buffet service.
Choose a bistro tabletop around 24 to 30 inches wide instead of a six-foot banquet table. Angle its two chairs toward the rear and left so neither blocks the central route. Turn the lounge chairs toward each other, with their small side table outside the walking strip. If chair pull-out narrows the route, remove one lounge seat instead of relocating it across the entrance.
For a short gathering, flexible chairs can move between dining and lounge use as needed. Mark a parking spot for spare seating outside the main path. This prevents the layout from becoming crowded after the first seating change.
Use the first hour of the event to observe where people naturally gather. Shift a small movable piece if it creates a recurring bottleneck. If guests cannot move easily, simplify to one dominant activity beneath the canopy.
A clear floor plan makes a modest shelter feel more useful than a crowded multifunctional one. When seating takes priority, move displays or serving supplies to another sheltered location.
Position 12×12 Canopy Sidewalls Around Seating Areas
For low afternoon sun, install one compatible sidewall on the sunward edge before considering additional panels. Keep the main entrance visible and usable, with seating positioned beyond the strongest direct glare. Move chairs toward the deeper shaded area rather than forcing guests to sit along the exposed perimeter. Check the arrangement again as the sun lowers because protected floor space shifts during the event.
Keep fabric panels clear of heat-producing equipment and electrical fittings according to their instructions. Check that walls, zippers, and securing straps do not intrude into occupied seating space. A wall that blocks the view from a dining seat may be better positioned behind the buffet.
Some canopy designs use removable panels while others require model-specific attachment hardware. Confirm compatibility with the actual frame rather than assuming a nominal twelve-foot wall fits. For changing weather, a comparison of open canopies and enclosed tents clarifies how ventilation and exposure affect layout choices. Do not replace the manufacturer’s anchoring instructions with ad hoc ties on lightweight furnishings.
Leave room to open sidewall entrances without dragging fabric across chairs or merchandise. Use one clear opening as the ordinary entrance and keep required exits unobstructed. Close or remove panels promptly when the manufacturer or event operator requires it for conditions.
For afternoon dining, place the shaded seating away from the lowest incoming sun angle. For merchandise, avoid a solid wall that hides the product display from passing customers. For lounges, balance privacy against the comfort provided by moving outdoor air.
| Observed constraint | Layout adjustment | Verify before guests arrive |
|---|---|---|
| Low afternoon sun | Place one compatible sidewall on the sunward edge and shift chairs inward | Glare at occupied seats, airflow, and an open entrance |
| Wind or gusts | Secure the canopy as specified, lower tall displays, and follow event restrictions | Anchoring, exposed products, and the manufacturer’s weather limits |
| Soft or uneven grass | Use a suitable stable surface and furniture feet that stay level | Sinking legs, raised mat edges, and wheelchair approach |
| Buffet queue crosses dining | Move beverage service or food pickup outside the chair circulation route | A guest carrying a plate while diners stand up |
| Customers gather at checkout | Move the counter to the rear or side and preserve a visible exit route | Two browsers passing while another customer pays |
| Mobility access is restricted | Rearrange tables around a continuous accessible route and necessary turning area | Approach surface, unobstructed width, and actual maneuvering space |
Keep Walkways Clear in a 12×12 Canopy Tent Layout
Mark a three-foot clear route as an initial planning target wherever people must travel through the canopy. Measure between occupied chair backs and display edges instead of using the nominal twelve-foot roof width. A three-foot strip alone does not provide every wheelchair turning maneuver or satisfy every applicable access requirement. Test the route when people are seated, browsing merchandise, or collecting food rather than when the shelter is empty.
Public-facing events may require accessible routes, turning space, stable surfaces, and other applicable provisions. At public-facing events, the U.S. Access Board’s accessible-route standards specify at least 36 inches of continuous clear width for qualifying walking surfaces. That requirement does not mean every 36-inch passage automatically provides adequate turning or event access.
Measure the route after chairs are occupied and again while guests are standing. Account for bags, table skirts, display feet, support legs, and other items that narrow the path. Keep visible exits open even when queues, serving lines, or lounge groups change position.
When furniture nears a frame, an explanation of canopy components and functions helps identify pieces that must remain unobstructed. Do not hang heavy storage from frame members unless that exact canopy permits the load. Keep guy lines and anchors clearly managed outside pedestrian approaches where possible.
For dining, ask one person to stand while another walks toward the canopy exit. For displays, check whether a shopper can pause without trapping someone behind the merchandise counter. For lounging, pull each chair away from the side table to reveal its full occupied footprint. If the route closes during these tests, reduce furniture before treating a narrow gap as usable circulation.
When the walkway fails the test, remove furniture before reducing its clearance.
Mark each action as you prepare your setup. Conditional tasks may be marked not applicable. Progress is temporary and resets on page reload.
Checking an item records your actions; it does not certify weather safety, anchoring, or accessibility compliance.
Use this checklist to prepare a practical dining, display, or lounge arrangement beneath a 12×12 canopy. The stages cover measurements, furniture positioning, anchoring, circulation, weather checks, and optional accessories. Tick completed tasks, mark conditional tasks as not applicable when appropriate, and use Reset to begin another walkthrough. Source: Shelter Set.
Frequently Asked Questions about a 12×12 Canopy Tent
How many guests can dine comfortably under a 12×12 canopy tent?
Four diners around a single 42- to 48-inch round table are a reasonable starting configuration. Place one chair on each side and measure the space needed to stand and leave the table. The nominal 144-square-foot roof area includes space consumed by furnishings and canopy structure. Six guests around a larger top can make buffet access and chair movement considerably tighter.
For a formal meal, give guests enough room to stand without moving another chair. A casual snack arrangement may use less table space because visitors do not remain seated together. Set out the actual chairs and test the route before deciding on the final count.
An open-sided canopy does not automatically make the ground beyond its roof practical dining space. Keep chairs away from wet edges and exposed support hardware when the weather changes. If movement feels restricted, plan a second seating area instead of adding more chairs.
Can a 12×12 canopy tent accommodate two round dining tables?
Two round tabletops may fit, but chairs around both can make a twelve-foot canopy difficult to navigate. Two small standing-height cocktail tables near opposite sides are more practical than two seated dining groups. For seated dining, start with one compact round table and a separate serving position outside the shelter. If two tables are essential, draw each chair in its pulled-out position before counting available seats. Where those chair footprints overlap, reduce the number of diners instead of assuming both tables provide full capacity.
How much chair clearance is needed inside a 12×12 canopy?
For layout testing, allow roughly 30 to 36 inches behind chairs where diners need to rise or pass. An accessible route has separate requirements and should not be inferred from that furniture planning allowance. A four-place round table can still block continuous circulation when every chair is pulled away from it. Measure actual furniture in use and preserve an unobstructed approach to the exit.
Chair styles vary, so test the actual depth of the selected seat and its backrest. Give more room where staff carry dishes or guests pass behind seated people. Reduce seating when chair pull-out clearance overlaps the only exit route.
What table sizes work best for a 12×12 canopy dining setup?
For four diners, a 42- to 48-inch round table balances tabletop area with chair access. A six-foot rectangular table can suit four guests when two chairs line each long side. A 24- to 30-inch bistro table fits better when a small lounge must share the shelter. Choose among these arrangements after checking frame obstructions and the real depth of occupied chairs.
For a two-person meal, a compact square table often leaves more room for circulation. For four guests, a smaller round table may provide easier conversation and simpler chair placement. For a buffet, a narrow rectangular surface usually uses perimeter space more efficiently.
Avoid relying on nominal twelve-foot roof dimensions to calculate exact furniture clearance. Frame supports, sloping ground, and sidewalls can reduce usable space in different locations. Mock up the complete setting and move pieces until every person can enter and leave easily.
Can a 12×12 canopy tent hold a buffet and seated guests?
A four-foot buffet and two-person dining setting are a sensible starting combination under a twelve-foot canopy. Place the buffet at the rear and a small cafe table toward the front on the opposite side. Direct the serving queue along one edge instead of routing it behind the dining chairs. Keep preparation and temperature-sensitive food storage separate from public circulation as the menu requires. Choose buffet-only service when a larger dining group would block the available travel space.
Estimate the busiest moment rather than counting only the people already seated. Guests may gather beside serving dishes while others return with plates or stand to leave. A quick rehearsal with chairs pulled out shows whether the arrangement truly works.
How can vendors display tall products under a 12×12 canopy?
Place tall merchandise against a stable rear or side display instead of near the entry. Measure its overall height against the lowest frame members and sidewall fittings. Use appropriately rated freestanding fixtures rather than hanging heavy stock from unapproved canopy components. Keep the highest items below sightlines that customers need for finding the exit or checkout.
A tall fixture at the back can frame the booth without hiding nearby displays. Check whether customers can examine the item without pulling it into the main path. Place heavier products closer to the floor and stabilize the structure as directed.
If a display must be demonstrated, reserve a separate handling area beside its usual position. Do not let the demonstration block a neighboring vendor’s space or emergency route. Move extra cartons outside the browsing area so the overall height remains visually manageable.
Recheck overhead clearance whenever the canopy’s leg height changes.
What flooring works best for a 12×12 canopy lounge on grass?
Firm, stable modular outdoor flooring can work well when it is rated for the grass conditions and furniture used. Choose connected panels that sit evenly rather than loose mats with raised corners. Make entry edges gradual and secure, especially where guests use mobility aids or walk in low light. On soft or uneven ground, correct the base conditions first instead of hiding hazards beneath decorative flooring.
How should lighting be arranged inside a 12×12 canopy tent?
Place low-glare lighting above circulation and activity zones rather than aiming bright beams directly at seated guests. Use fixtures suited to the outdoor environment and follow the canopy manufacturer’s attachment restrictions. Battery-powered lighting can simplify layouts by avoiding cords across entrances and walking routes. Keep lights and batteries away from moisture, heat sources, and areas where fabric may contact them.
For dining, distribute gentle light across the tabletop so faces and plates remain visible. For displays, direct focused lighting toward products without causing glare at eye level. For lounging, use softer perimeter light while retaining clear visibility along the exit route.
Can a 12×12 canopy layout accommodate wheelchair users?
Wheelchair access can work when furniture is arranged around a continuous accessible approach instead of an assumed empty square. Provide a firm and stable surface with the required clear route width from the surrounding site. Where turning is necessary, check the maneuvering area as well as the straight passage. Position an appropriate dining or viewing space directly beside the accessible route rather than behind occupied chairs.
Choose a table position that a wheelchair user can approach without passing between tightly packed chairs. Check the surrounding ground and transitions into the canopy for bumps, slopes, and loose materials. For public events, assess all applicable accessibility requirements beyond the canopy’s nominal dimensions.
Test the layout with realistic chair positions and a person moving through the entire approach. Do not treat a narrow entrance opening as proof that a full turning movement is possible. Rearrange the furniture before the event if an occupied chair blocks the accessible path.
How can I adjust a 12×12 canopy layout for afternoon sun?
Identify the edge receiving the lowest afternoon sun at the time guests will be using the canopy. Move lounge chairs and dining seats inward toward deeper shade, then consider one compatible sunward sidewall. Keep the primary entrance and circulation route clear after installing any fabric panel. Review glare and airflow throughout the event because sun angle and wind can change.
Shift merchandise that can fade or heat up away from direct sun exposure. If a wall blocks ventilation or sightlines, adjust furniture placement before adding more fabric. Check the sun position again as the event progresses because the shaded floor area changes.
For a meal, avoid seating guests where late sunlight shines directly into their faces. For a market booth, protect products without hiding the display from the public approach. For a lounge, prioritize both shade and comfortable airflow rather than maximizing furniture count.
Recheck the escape path after every adjustment to chairs, sidewalls, and displays.
What to Remember About 12×12 Canopy Tent Layouts
Choose one practical 12×12 canopy layout: a four-place round table, an open-front L-shaped display, or two facing lounge chairs. Keep a direct approach to the entrance, then arrange seating, products, or service around that route. Measure the actual frame clearance and occupied furniture footprints before deciding how many guests can fit.
A compact bistro-and-lounge combination is a useful alternative when one shelter must support two activities. If the occupied arrangement blocks movement, remove furniture rather than increasing the guest count.