
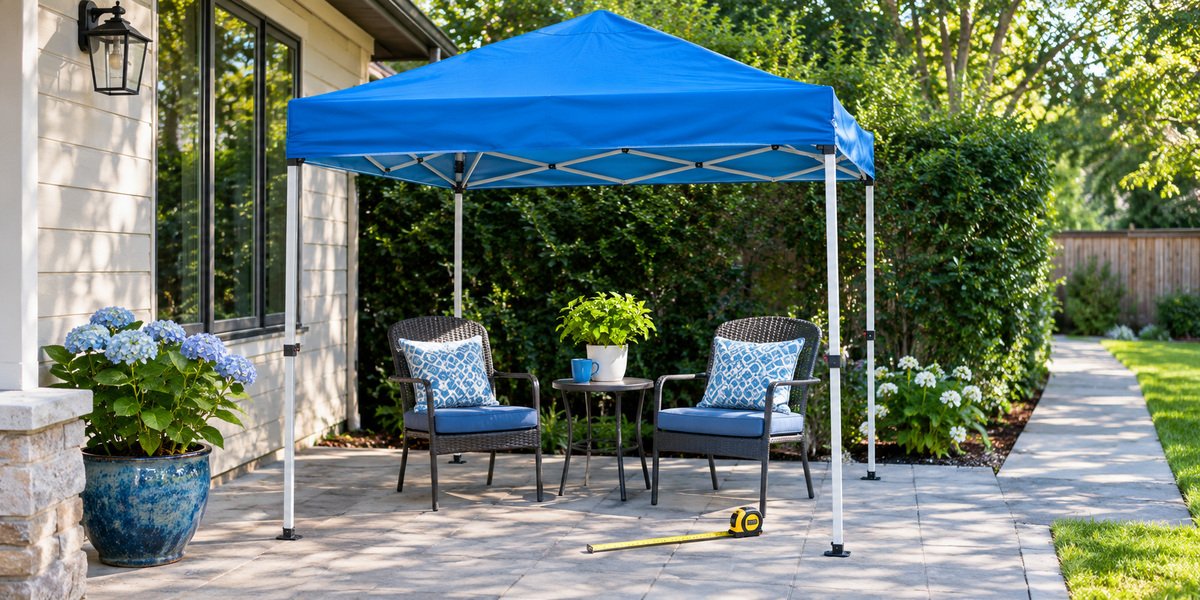
A small canopy tent with a 5×5 roof offers 25 square feet of nominal cover for one compact station. A 6×6 roof expands that footprint to 36 square feet, although furniture can still crowd the opening. An 8×8 roof reaches 64 square feet, making small seating groups or merchandise displays easier to arrange. These measurements describe roof area, so check actual leg spacing and anchoring space before choosing a size.
Smaller canopies are easier to place where full-size event shelters would obstruct doors or planting beds. Their limited coverage also makes planning for shifting sunlight, rain, and people especially important.
Start by measuring the open ground and the route used to carry the folded shelter into position. Next, compare the usable width between legs with the furniture or equipment that must fit beneath it. Finally, reserve separate space outside the roof for approved anchoring and safe circulation.
This guide compares compact footprints, patio and vendor layouts, seating, overhead clearance, and practical weather limits. Dimensions are planning figures unless an exact manufacturer’s model specification is identified. The safest selection is one that fits the whole setup, not merely the roof’s advertised square footage.
Jump to a specific section on this article
Compare 5×5, 6×6, and 8×8 Small Canopy Tent Sizes
A nominal 5×5 canopy forms a 60-by-60-inch square with 25 square feet of roof coverage. Moving to 6×6 increases the side length to 72 inches and expands nominal coverage by 44 percent. An 8×8 roof spans 96 inches on each side and supplies 64 square feet of nominal cover. That is 2.56 times the 5×5 area, although actual frames may have different leg footprints.
These values describe roof rectangles rather than guaranteed dry floor areas beneath them. Actual leg positions can project beyond the roof, particularly on slant-leg frames. Product labels may describe canopy top dimensions, leg footprint, or both.
Square roof dimensions compared at the same scale. Select any bar with a pointer, tap, Enter, or Space to reveal its calculation.
Method and provenance: Reproducible geometric calculations, width × depth, for nominal square roof dimensions; Shelter Set calculations, 12 November 2026. Units: feet and square feet; no sampling, field measurements, manufacturer tolerances, or location-specific factors are involved. Roof area is not usable aisle area or guaranteed weather protection.
For a wider comparison of common roof footprints, the canopy tent size chart shows how coverage scales across models. Match the dimension definition before using any advertised size in a layout. Square footage alone cannot show whether a particular chair or table fits.
Inside a nominal 60-inch 5×5 square, a 30-inch table leaves just 15 inches on either side. A 48-inch counter beneath a 6×6 roof leaves only 12 inches on each side before leg intrusion. The same counter beneath an 8×8 roof leaves 24 inches on each side before frame intrusion. These calculations illustrate furniture fit rather than safe aisle widths or guaranteed internal clearances.
MasterCanopy specifies a 60-by-60-inch roof and 38.9-pound weight for its Commercial Series Easy Pop-Up 5×5 steel canopy. ABCCANOPY describes 36 square feet of coverage for the 6×6 Outdoor Easy Pop-Up Canopy Tent with two sun walls. TentCraft lists 64 square feet and a 58-pound weight for its 8×8 MONARCHTENT Standard Peak aluminum model.
Measure the Footprint and Usable Floor Space of a Compact Canopy
Start with two measurements: the distance between the support feet and the narrowest opening between leg faces. A 60-inch-wide roof does not automatically create an unobstructed 60-inch passage through its frame. Measure the inside leg gap at tabletop height and inspect the floor-level footplates separately. Put the smaller usable dimension on your sketch before drawing furniture or an entrance route.
Choose a level measuring surface and fully extend the frame according to its instructions. A tape measure across each side reveals whether the footprint is square or slightly irregular. Check diagonal measurements if the feet appear out of alignment.
When a manufacturer lists slanted support legs, the basic canopy construction explains why roof area and floor geometry differ. An eight-foot roof does not prove that a full eight-foot table can pass between the legs. Subtract any leg intrusion before placing cabinets, shelves, or serving furniture. Use the smallest relevant clear width for objects that must move through the entrance.
For a 6×6 roof, draw a 48-inch-wide display counter against one perimeter before placing any chairs. The nominal plan then leaves 24 inches of combined side clearance, before support-leg intrusion. Use a full-size tape outline to see whether storage, customer movement, and access can actually coexist.
Measure both the fabric edge and the support-foot outline during a trial setup. The bigger boundary usually controls the required clear ground area.
| Site-fit check | What to inspect | Decision rule |
|---|---|---|
| Leg and foot geometry | Measure between inside leg faces and around each footplate at the proposed site. | Use the smaller usable opening rather than assuming the roof edge is the leg boundary. |
| Furniture movement | Open chairs, drawers, and display equipment in their operating positions. | Change the furniture plan if any movement obstructs the entrance or touches the frame. |
| Walkway and exit | Trace the route people actually take between the approach, seating, and exit. | Keep that route unobstructed and confirm the site’s applicable accessibility rules. |
| Anchoring footprint | Lay out the manufacturer’s approved weights, stakes, or lines before placing furniture. | Reject layouts where securement occupies a prohibited area or blocks access. |
| Overhead and assembly | Check nearby eaves, branches, signs, and the full frame movement during setup. | Choose another position if assembly or the erected roof could strike an obstruction. |
| Site permissions and exposure | Review the operator’s shelter rules, weather forecast, and removal instructions. | Proceed only where the structure, installation method, and expected conditions are permitted. |
Choose a Small Canopy Tent for Narrow Patios
A 6×6 patio layout needs a nominal 72-inch square before allowing additional room for frame feet. A patio measuring exactly six feet across may fail once walls, railings, or anchoring interfere. Measure the narrowest usable span and door-opening sweep rather than the patio’s longest dimension.
Begin with a paper outline of the available patio, including immovable fixtures. Place the proposed canopy footprint inside it before adding furniture symbols. Check whether opened doors would strike the roof edge or supporting leg. Remember that attachment points and ground anchors may occupy additional exterior space.
Where the patio adjoins a building, water runoff can collect near an entrance. Direct roof drainage away from thresholds and surfaces that become slippery. Do not assume patio pavers or deck boards can accept ordinary ground stakes.
On pavers, use only the ballast arrangement specified for the chosen frame and surface. Four unverified generic sandbags should not be assumed sufficient for every wind exposure. Keep approved weights inside the permitted ground area without blocking the main doorway. Relocate the canopy if safe securement would extend into an exit or neighboring property.
A dry test setup shows whether the canopy can be erected without contacting nearby walls. Keep a clear route for folding and removing the frame afterward.
Choose a smaller roof when its complete secured footprint is the only one that fits safely.
Plan a Compact Vendor Booth Under a Small Canopy
A compact vendor booth must accommodate its counter, one worker, merchandise, and a customer-facing approach. In a 6×6 plan, a 24-inch-deep rear counter leaves 48 inches of nominal depth ahead. The same counter in an 8×8 plan leaves 72 inches ahead, before legs and customer movement. These sketches are planning illustrations, so confirm actual vendor pitch rules and equipment dimensions.
Position the main display where customers can approach without entering the work area. Keep stock boxes below shelves rather than stacking them in the access path. Place a payment station where both the seller and customer have room to turn.
Before booking a market pitch, compare the expected stall width with standard 10×10 booth dimensions used at many events. Some organizers require a full-size shelter or a specific appearance for consistent vendor rows. The site rules control eligibility even when a smaller tent physically fits.
Put the front of the display where customers can browse without stepping into the working zone. Keep an additional stock container below the 24-inch-deep counter rather than in the entrance. Walk the operator’s route from payment point to storage while the full display is installed.
Food sellers may need separate clearances and equipment arrangements beyond ordinary retail stalls. Confirm any electrical or fire requirements before finalizing the layout.
Reserve the busiest path for people rather than product storage.
Arrange Two-Person Seating Under a Small Canopy Tent
Under a nominal 6×6 roof, two narrow chairs fit most simply along one side. Two 20-inch seats and a 12-inch side table consume 52 inches of nominal width. That leaves 20 inches before chair separation, support legs, and an exit route are considered.
Trace the chairs in their occupied positions rather than their empty folded dimensions. Slide each chair backward as someone would when standing up. Confirm that neither movement crosses a frame foot or anchoring component. If circulation becomes tight, switch to one chair and a compact bench or stool.
An 8×8 configuration can give two people breathing room and a wider entry. Its extra area is most useful when paired with a restrained furniture arrangement. A large centerpiece may erase the practical benefit of the bigger roof.
In an 8×8 layout, try two 22-inch-wide chairs with a 16-inch shared side table. Together those objects take 60 inches of width, leaving 36 inches before allowing for legs. Place the entrance on the relatively open side, then pull both chairs into occupied positions. The example assumes these furniture sizes solely for planning, not as a tested canopy configuration.
Folding chairs are convenient for transport but still need a measured operating footprint. Weatherproof cushions and bags should not block the limited walking zone. Prioritize easy entry and stable ground over squeezing in extra furniture.
Allow Furniture and Walkway Clearance in Small Canopies
A narrow clear path matters more than nominal square footage when people carry items. Plan the busiest movement route first, then fit furniture around that corridor. Keep canopy legs and their footplates outside the intended path wherever possible.
Draw a 24-inch-deep counter and a chair requiring another 24 inches of operating depth. Within a nominal 60-inch side length, that leaves only 12 inches before any frame intrusion. Such a gap demonstrates crowding rather than a practical or accessible walking route. Turn the chair sideways or choose a larger footprint instead of squeezing through.
Clearance changes with the activity and with the number of simultaneous users. A solitary potting station needs different circulation from a refreshments line. Do not substitute roof width for a measured passage between objects.
At public events, verify walking clearances against the accessibility rules that govern the site. Under the United States ADA standards, accessible walking surfaces generally need 36 inches of clear width. Specific exceptions and turning requirements apply, so a 36-inch strip alone may be insufficient. Measure the route around chairs and canopy feet rather than assuming nominal roof width establishes compliance.
Before guests arrive, repeat the walking test with every item fully deployed. Check that cords and ballast remain out of foot traffic. Treat clear circulation as a requirement rather than spare space.
Measure Leg Spacing Around Furniture
Place a tape measure at furniture height to check the opening between the inner leg faces. A 48-inch tabletop might clear the legs while wider chair backs collide with braces. Record the frame’s narrowest gap at both sitting height and ground level. Then move the furniture through the intended entrance before treating the arrangement as workable.
Use the smallest measured gap when selecting rigid tables and display cabinets.
Keep tall fixtures away from scissor trusses and corner brackets.
A masking-tape outline makes the support footprint visible before assembly. Move furniture through the marked entrance to reveal hidden pinch points. If the movement fails, reduce furniture size rather than forcing the frame.
Keep Small Canopy Entrances Clear for Guests
Entrances should align with the actual route guests take from the surrounding area. Do not direct people around a corner footplate immediately after entering. Use the broadest unobstructed side for regular access when site conditions permit. Keep free-standing signs outside the approach without crossing neighboring boundaries.
Test a full arrival and exit with both occupants seated under the canopy. A 24-inch-deep chair may intrude into the entrance when pulled backward for standing. Move the shared table toward the rear or switch the entry side if that happens.
Watch the flow during a realistic two-person trial rather than relying on drawings. Shift the seating if one participant must step backward into the exit. Leave space for someone to move aside without approaching a hot appliance. Small changes in furniture orientation can release a substantial amount of usable corridor.
Check visibility into the shelter from the surrounding walkway. Do not place loose items where an arriving guest might trip. Maintain a straightforward exit route throughout the gathering.
Allow Extra Ground Space for Small Canopy Anchors
Imagine a 6×6 canopy whose proposed anchor lines extend two feet beyond both opposite roof edges. That hypothetical arrangement would need a ten-foot-wide setup zone although the roof spans only six feet. Replace those illustrative offsets with the approved anchoring geometry for the exact frame.
Grass or soil may allow specified stakes where underground utilities are not at risk. Hard surfaces require a securement approach designed for that frame and location. Keep weights and straps positioned as the manufacturer directs, without obstructing access. Do not assume a lighter roof can safely operate without anchoring.
To balance carrying weight and structural choices, canopy buying considerations also cover frame and fabric trade-offs. A heavy ballast bag still needs correct attachment to the intended frame point. Unapproved improvised objects can slip, tip, or introduce a new trip hazard.
Draw a boundary around approved weights, stakes, and lines rather than stopping at the four canopy feet. If securement extends 18 inches beyond each side of a six-foot square, total width reaches nine feet. This numerical example illustrates planning only; it is not a manufacturer’s ballast or guy-line specification. Check the full boundary against vendor pitch limits, walkways, and neighboring property.
Ground space is adequate only when the deployed roof and all securement components fit. Check site permission before driving any stake into the ground.
Check Small Canopy Height Beneath Trees and Eaves
Roof height must be checked at the peak and along the lower edge. Branches, gutters, light fixtures, and awnings can obstruct the frame during unfolding. Measure overhead clearance along the full route used to raise the canopy.
TentCraft lists a 10-foot-10-inch peak height for its 8×8 MONARCHTENT Standard Peak canopy. The same manufacturer’s listing specifies 6 feet 8 inches of head clearance, a separate limiting measurement. Compare both heights with low branches, eaves, and signs before deciding where to place it. Leave enough vertical room for unfolding and raising the frame without touching any overhead structure.
During assembly, the frame may need additional clearance while its roof members move into position. Inspect nearby trees for low branches and falling debris, not merely the height directly above the center. Never assemble beneath power lines or any damaged limb that could strike the shelter.
On a patio, roof runoff and gutter discharge can combine above one corner. Avoid positioning fabric where a downspout empties directly onto the roof. Choose a different position if the available clearance requires bending or modifying the frame.
Use the manufacturer’s specified height settings rather than improvised intermediate positions. When uncertain about a fixed obstruction, verify with a trial fit before an event.
Assess Shade and Rain Coverage Under Small Canopy Tents
An 8×8 roof offers 64 square feet of nominal coverage, but the shadow moves across the day. Morning sunlight may enter under the eastern edge while late sunlight arrives from the opposite direction. Check the site during the intended event hours rather than assuming the whole floor remains shaded. Keep seats and displays movable without disturbing anchors or blocking the entrance.
Wind-driven rain can reach furniture under a roof even when that furniture fits completely within the nominal footprint. Put paper goods and electrical equipment away from exposed edges and any concentrated roof runoff. Plan a sheltered alternative for visitors who otherwise must wait outside the canopy.
For context on closed shelters, the canopy versus tent distinction helps explain why open sides behave differently. Adding sidewalls changes ventilation, wind exposure, entry width, and attachment requirements. Use only sidewalls that are approved for the exact frame and roof configuration. Never treat a weather-resistant fabric label as evidence that the whole assembly withstands severe weather.
When thunder is heard, the National Weather Service lightning guidance directs people into substantial buildings or enclosed vehicles. An open canopy cannot provide lightning protection even when its roof remains dry. Identify a safer shelter before starting any outdoor event.
Check the forecast for wind, thunderstorms, and heavy rain before setting up. Follow the exact manufacturer’s limits and take-down instructions rather than applying a generic wind threshold. A small shelter is most useful when the weather plan extends beyond its fabric.
Recognize When a Small Canopy Tent Is Too Small
A 5×5 roof becomes impractical for facing chairs when occupied seating blocks entry or exit. One 24-inch-deep table between two 24-inch-deep chairs would require 72 inches in a straight line. That furniture depth exceeds a nominal 60-inch roof before allowing any movement or leg intrusion. Reduce the furniture or choose a larger secureable setup instead of squeezing the aisle.
Try the full layout with the maximum expected number of people present. Include any coolers, display boxes, serving equipment, and personal belongings in the test. Check the approach and removal route as well as the area beneath the roof.
An 8×8 roof provides 28 more square feet of nominal cover than a 6×6 roof. However, those longer sides may exceed the dimensions of a patio or assigned market pitch. Select the larger canopy only if overhead clearance, access, and approved anchoring also fit.
Reduce furniture before assuming a different tent solves every clearance problem. Consider a separate shade umbrella for a single chair when the full frame will not fit. For wider work areas, a larger approved canopy may reduce crowding.
Make the final choice using measured leg spacing, overhead height, and clear access. Confirm that the exact selected frame can be anchored on the intended surface. Choose another location if installation would block exits or damage surrounding structures. Preserve space for the shelter’s safe removal if conditions deteriorate.
Select the smallest canopy that accommodates people, furniture, securement, and circulation without compromise.
Frequently Asked Questions about Small Canopy Tents
Can One Person Set Up a Small Pop-Up Canopy Tent?
One person can assemble certain compact canopies when the manufacturer explicitly supports solo setup. First confirm the instructions for the exact frame, since folding mechanisms vary substantially. Clear the working area before spreading the frame and lifting the roof. Do not force sliding joints or support a partially opened canopy in gusty weather.
Many models require two people to extend opposite corners without twisting the frame. A solo-friendly mechanism does not remove the need for approved anchoring. Practice the complete process on calm ground before taking it to an event.
Keep children and visitors outside the movement area while unfolding the structure. Stop if a locking component fails to engage according to the instructions. Choose a second helper whenever the frame weight or conditions exceed comfortable control.
Are Small Canopy Tents Suitable for Apartment Balconies?
An apartment balcony can host a canopy only when property rules and approved securement arrangements allow it. Even a 5×5 roof spans a nominal 60 inches before any leg-foot projection or ballast. Across a six-foot-wide balcony, that would leave only 12 inches of nominal width unoccupied. Never fasten the frame to a railing without explicit building approval and engineering guidance. Choose another shading solution when the anchored footprint or exit path cannot fit.
What Is the Smallest Canopy Tent Allowed at Craft Fairs?
No single minimum canopy size applies across craft fairs because each organizer specifies its booth requirements. A 5×5 pitch offers 25 square feet, often suiting one compact information or merchandise station. A 6×6 pitch increases nominal cover to 36 square feet but still needs staff and customer clearance. Confirm the stall’s permitted frontage, maximum footprint, ballast requirements, and accepted shelter styles before booking.
Bring a dimensioned sketch showing every leg and external anchor. Leave merchandise displays within the assigned stall rather than occupying circulation space. If the organizer insists on a larger standard footprint, a small canopy may be ineligible.
How Do Small Canopy Tents Compare With Patio Umbrellas?
A compact canopy usually shades a more defined rectangular area than a typical central-pole umbrella. Its four legs also occupy corners and need space for independent securement. An umbrella can place shade over a single table without a full folding frame. The better choice depends on the intended activity and movement routes.
A central umbrella pole may interfere with a table unless that table accommodates it. An offset umbrella transfers loads to its base and still needs substantial clearance. Neither option should be left open during conditions that exceed its instructions.
Compare the deployed footprint rather than only the advertised shade diameter or roof width. Check how each structure handles runoff, moving shadows, and storage. Select the arrangement that maintains clear doors and walkways.
Can Small Canopy Tents Be Installed on Sloping Ground?
Use a small pop-up canopy on level ground unless its manufacturer specifically approves another configuration. A slope can leave legs uneven, preventing the frame from locking or loading properly. Do not compensate using loose blocks beneath individual feet. Water may also flow through a downhill seating or vendor area during rain. Choose a level nearby position if the terrain prevents stable, approved setup.
Check the slope across both dimensions rather than judging only by eye. Confirm that all feet contact the surface as intended and can be secured correctly. If that cannot be achieved, use another location or a shelter designed for the terrain.
Are Sidewalls Practical for Small Canopy Tents?
Sidewalls can reduce low-angle sun exposure and light splash but narrow a compact entrance. Use only walls designed for the exact canopy frame and attachment system. A wall can trap heat and increase wind loading on an exposed shelter. Keep at least one usable entrance aligned with the planned walking route.
Measure the interior after closing the wall rather than assuming the original layout survives. Avoid letting fabric contact hot equipment or obstruct a required exit. Follow the maker’s instructions for removing walls when weather becomes unsuitable.
Mesh panels may help with insects while still changing airflow and access. Opaque walls offer privacy but reduce outward visibility for vendors and guests. Choose the minimum enclosure that addresses the actual activity.
Never use extra walls as a substitute for compliant anchoring.
Will a Folded Small Canopy Tent Fit Inside a Compact Car?
A small roof can fold into a rigid package too long to pass through a compact car’s hatch. TentCraft specifies a 64-inch packed length and 16-by-18-inch cross-section for its 8×8 MONARCHTENT Standard Peak. Compare that package with the vehicle’s actual hatch opening and diagonal cargo length. Keep room for passengers and secure the frame so it cannot shift during transport.
What Wind Conditions Require Taking Down a Small Canopy Tent?
Use the wind limits and removal instructions specified for the exact canopy model, not a generic speed. Two similarly sized roofs can have different frames, anchoring requirements, and exposed wind surfaces. Before gusts make handling dangerous, identify the conditions that trigger your take-down procedure. During lightning, leave the open canopy and move into an appropriate fully enclosed shelter.
Watch for changing forecasts and unusual motion at the feet and joints. Use a preplanned evacuation and dismantling procedure that does not expose people to falling components. Lightning requires everyone to leave the canopy and enter a safe enclosed shelter.
Do Small Canopy Tents Require Permits in Public Parks?
Check with the park authority before bringing any temporary canopy, even one advertised as compact. A 5×5 roof may be small, yet stakes and ballast can still require explicit permission. Rules can designate approved installation zones, maximum structure dimensions, and commercial-use restrictions. Verify the permit process and any separate requirements for food, electricity, or group events.
Get written rules for locations, anchoring methods, and maximum structure dimensions. A picnic booking does not automatically authorize merchandise sales or a tent installation. Check separate electrical, food-service, and fire rules when relevant.
Bring the authority’s approval and the canopy’s instructions on event day. Keep vehicle and pedestrian routes available as the park requires. Remove all hardware and leave the surface undamaged after use.
Can Replacement Roofs Be Purchased for Small Canopy Tents?
Purchase a replacement roof only when the manufacturer documents its compatibility with the exact frame. Two nominal 6×6 roofs may differ in corner geometry, peak attachments, and fabric tension. Confirm the brand, model number, size, and replacement part identifier before ordering. Never stretch an incompatible cover across the frame simply because the stated dimensions appear similar.
Inspect the existing frame for damage before ordering a new canopy fabric. Measure corner spacing and attachment locations only as cross-checks against the official part listing. Confirm the replacement’s included fittings rather than assuming hardware comes with it.
Keep the instructions and order record for future part identification. Replace damaged clips or fasteners only with approved components. If the frame is bent or unstable, a new roof cannot restore structural integrity.
Choose the complete compatible assembly when a safe replacement top is unavailable.
What to Remember About Small Canopy Tents
Choose a 5×5 for one compact station, a 6×6 for restrained seating, or an 8×8 for more layout options. Compare their 25, 36, and 64 square feet of roof coverage against actual leg spacing and furniture measurements. Draw the secured boundary and walking route to scale before deciding that a canopy fits. Follow the exact manufacturer’s weather and setup instructions at the selected location.